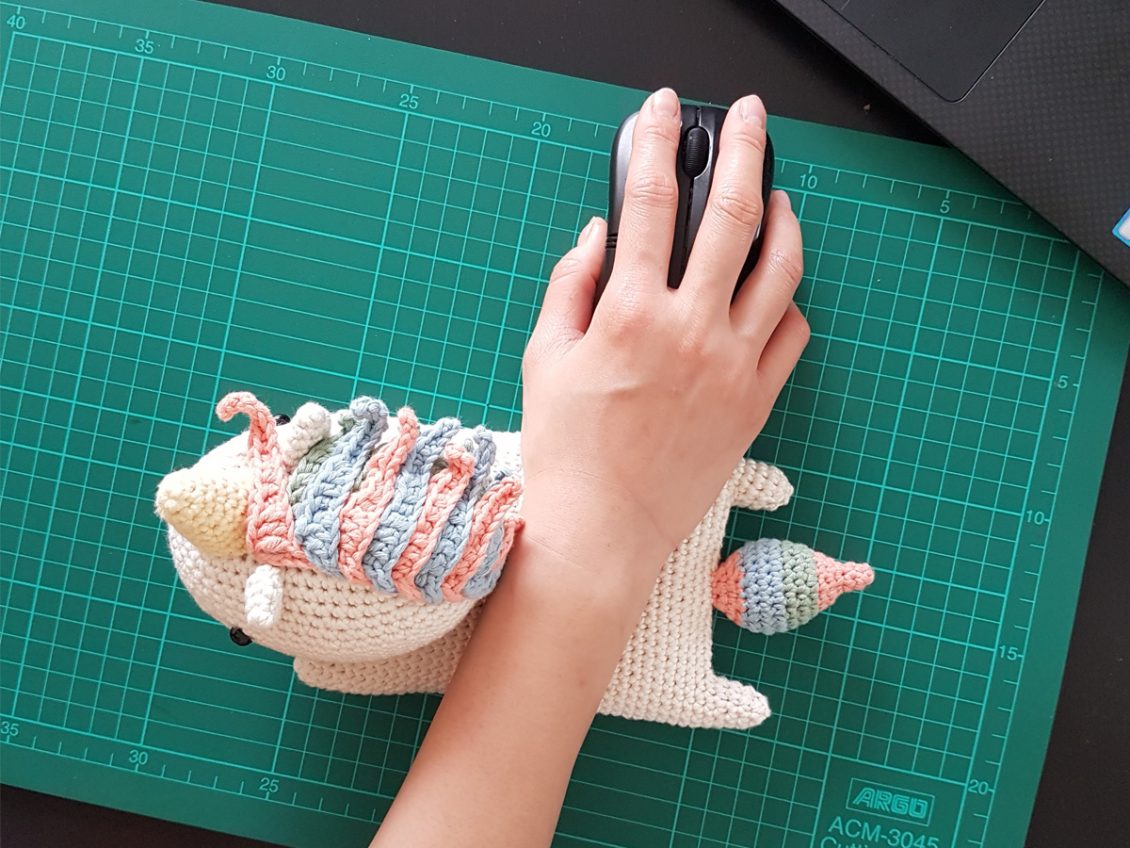

Most of us spend many hours on the computer and wrist pain can be quite common if you don’t have a way to to rest your wrist in a comfortable position. Instead of buying a generic mouse pad from the store, I decided to make my own wrist cushion. I love unicorns (who doesnt?!) so I thought it would make a cute companion to my mouse 🙂
Notes
-Hooks: 3.0mm (5/0 JNP standard hook) Or C2/D3 (US standard hook)
-Cotton Yarns (Fibra Natura Cottonwood Yarn): Cream, Janene (Light Yellow), Monica (Light Pink), Blue & Austin (Light Green)
– A pair of plastic eyes
-Polyester filling
-Tapestry Needle
-Scissors
-Stitch Marker
-This pattern is worked in Spiral Rounds
Abbreviations
ch(s)= Chain(s)
st(s)= Stitch(es)
sl st= Slip Stitch
sc= Single Crochet
hdc= Half Double Crochet
dc= Double Crochet
tr= Treble Crochet
Dec= Join next 2 single crochet together
Head
Use creamy color yarn,
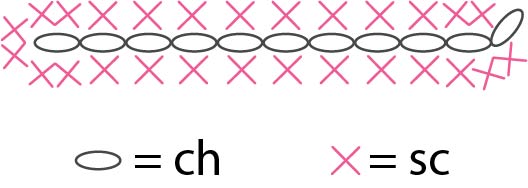
ch 11,
[For round 1, we’re going to crochet on the both sides of the foundation chain]
Round 1: 2sc into 2nd ch from hook, sc in next 8 chs, 6sc in next ch, sc in next 8 chs, 3sc in last ch (27)
Round 1
Round 2: 2sc in each of the next 2 sts, sc in next 9sts, 2sc in each of the next 4 sts, sc in next 10 sts, 2sc in each of the next 2 sts (35)
Round 3: 2sc in each of the next 2 sts, sc in next 13sts, 2sc in each of the next 4 sts, sc in next 14 sts, 2sc in each of the next 2sts (43)
Round 4: 2sc in next st, sc in next 19 sts, 2sc in each of the next 2 sts, sc in next 20 sts, 2sc in next st (47)
Round 5: sc around (47)
Round 6: *sc in next 3 sts, 2sc in next st*, repeat ** 1 time, sc in next 7 sts, 2sc in next st, sc in next 3 sts, 2sc in next st, sc in next 6 sts, 2sc in next st, sc in next 3 sts, 2sc in next st, sc in next 8 sts, *2sc in next st, sc in next 3 sts*, repeat ** 1 time (55)
Round 7: sc around (55)
Round 8: sc in next 5 sts, 2sc in next st, sc in next 3 sts, 2sc in next st, sc in next 7 sts, 2sc in next st, sc in next 3 sts, 2sc in next st, sc in next 10 sts, 2sc in next st, sc in next 3 sts, 2sc in next st, sc in next 8 sts, 2sc in next st, sc in next 3 sts, 2sc in next st, sc in next 5 sts (63)
Round 9-16: sc around (63)
-Insert plastic eyes between Round 9 and 10, 22 sts between 2 eyes
Round 17: *sc in next 7 sts, Dec, repeat from * till round ends (56)
Round 18: sc around (56)
Round 19: *sc in next 6 sts, Dec, repeat from * till round ends (49)
Round 20: *sc in next 5 sts, Dec, repeat from * till round ends (42)
Round 21: *sc in next 4 sts, Dec, repeat from * till round ends (35)
Round 22: *sc in next 3 sts, Dec, repeat from * till round ends (28)
Round 23: *sc in next 2 sts, Dec, repeat from * till round ends (21)
-Stuff filling
Round 24: *sc, Dec, repeat from * till round ends (14)
Round 25: *Dec, repeat * till round ends (7)
-Cast off, weave in ends
Horn
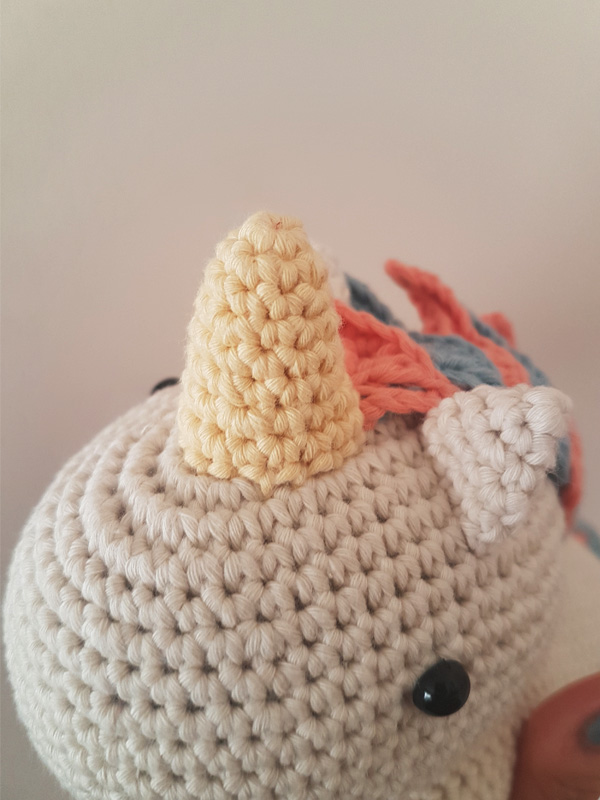
Use light yellow yarn,
Round 1: Magic Ring (6)
Round 2: *sc, 2sc in next st, repeat from * till round ends (9)
Round 3: sc around (9)
Round 4: *sc in next 2 sts, 2sc in next st, repeat * till round ends (12)
Round 5-6: sc around (12)
Round 7: *sc in next 2 sts, 2sc in next st, repeat * till round ends (16)
Round 8: sc around (16)
-Leave a tail and cast off
-Assembling on the top of the head
Body & Arms & Legs
Remain using creamy color yarn,
Start with the arms,
Arm A & B
Arm A
Round 1: Magic Ring (6)
Round 2: *sc, 2sc in next st, repeat * till round ends (9)
Round 3-4: sc around (9)
-Cast off
Arm B
The first 4 rounds are the same as Arm A but add 1 more round at the end of Arm B:
Round 1: Magic Ring (6)
Round 2: *sc, 2sc in next st, repeat * till round ends (9)
Round 3-5: sc around (9)
When Arm B is completed, do NOT cast off the yarn, we will continue to work on the body…
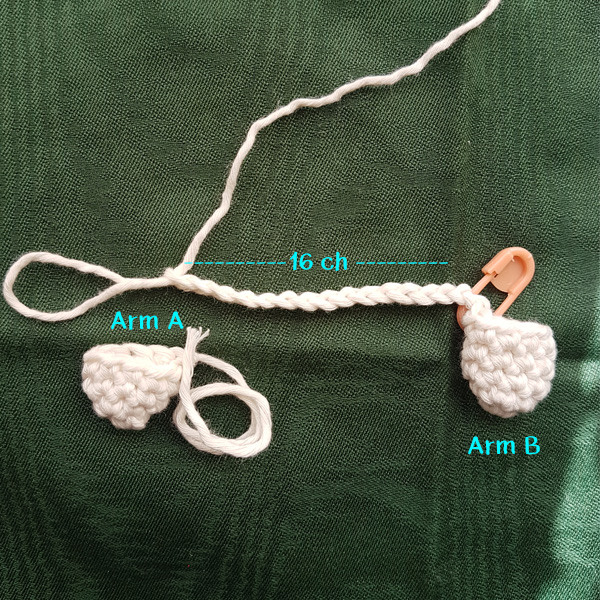

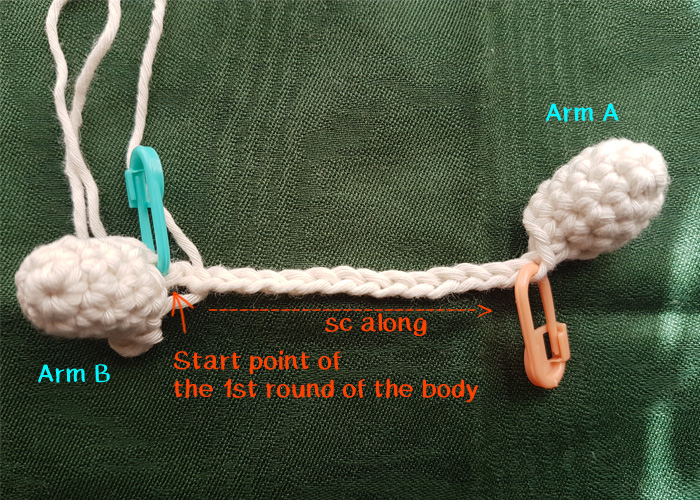
Body
After completing the last sc of the last round of Arm B, ch 16, then bring back Arm A and crocheting 9 sc around Arm A to connect both parts together.
Now, we can start the 1st round of the body.
sc along the chain (16 sc) & the arm (2nd arm,9 sc), sc the other side of the chain (16 sc) & the arm (1st arm, 9 sc) (50)
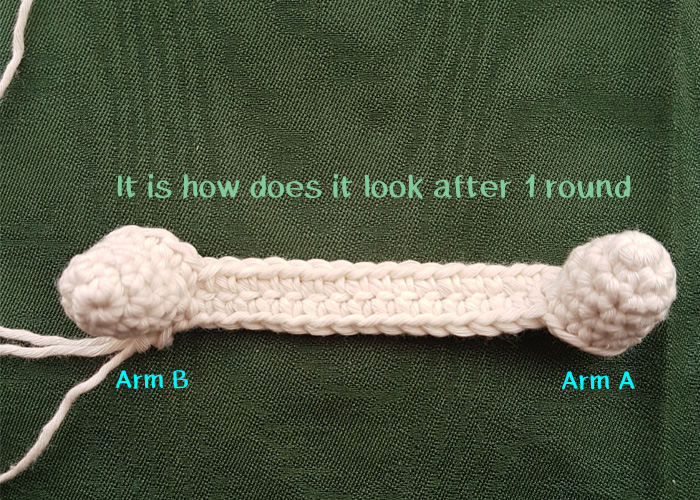
Round 2-35: sc around (50)
You can add more rounds to make the body longer, which means to make more room for your wrist to place.
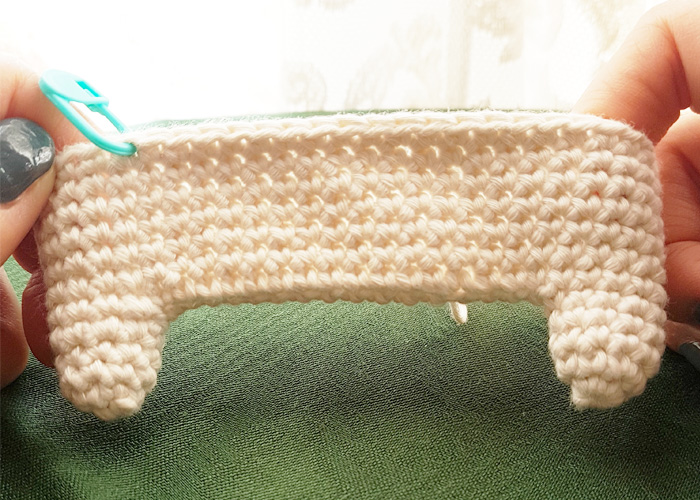
Legs
sc in next 6 sts after the last round of the body,
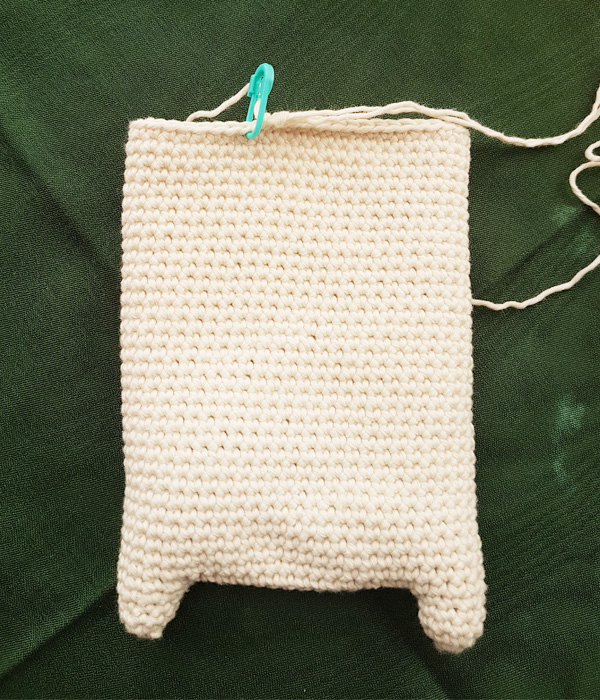

Then sc in next 9 sts, these 9 sts is the first leg.
Join the last sc of the leg into the 1st stitch of the leg, then continue the leg by crocheting 3 more 9sc rounds, then closing the leg by *sc, Dec, repeat * till round ends (6)

-Cast off, weave in ends
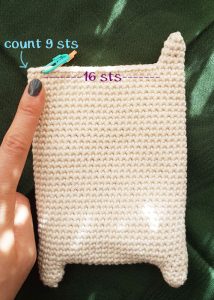
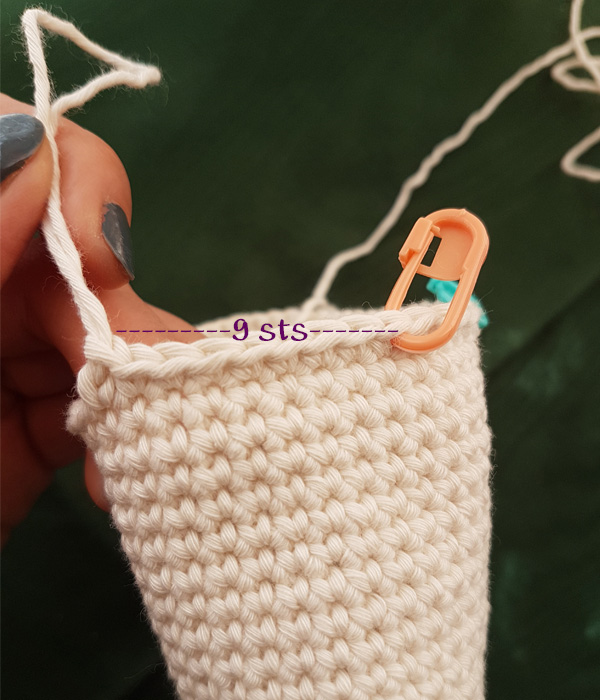
The second leg will be on the other end.
Leave 16 sts between 2 legs and count 9 sts on the other end.
Start with new yarn (same color), sc in those 9 sts.
Join the last sc of the leg into the 1st stitch of the leg, then continue crocheting 3 more 9sc rounds, then closing the leg by *sc, Dec, repeat * till round ends (6)
-Cast off
-Stuff the filling
Don’t stuff too much filling, just a thin layer which can support your wrist and make you feel comfortable.
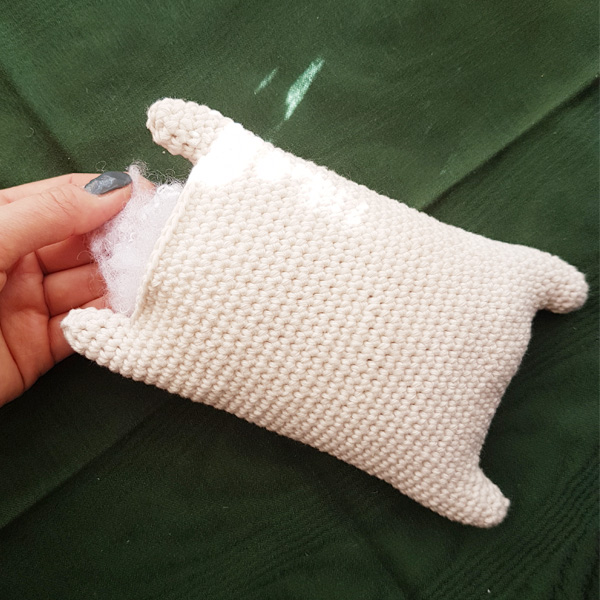

Cut a long yarn and close the body.
Tail
Start with light pink yarn,
Round 1: Magic Ring (4)
Round 2: *sc, 2sc in next st, repeat * till round ends (6)
Round 3: sc around
Round 4: *sc, 2sc in next st, repeat * till round ends (9)
Round 5: *sc in next 2 sts, 2sc in next st, repeat * till round ends (12)
Round 6: sc around (12)
– Change yarn to light green color
Round 7: *sc in next st, 2sc in next st, repeat * till round ends (18)
Round 8-9: sc around (18)
-Change yarn to light blue color
Round 10: *sc in next 2 sts, 2sc in next st, repeat * till round ends (24)
Round 11: sc around (24)
Round 12: *sc in next 2 sts, Dec, repeat * till round ends (18)
-Change yarn to light pink color
Round 13: *sc in next st, Dec, repeat * till round ends (12)
Round 14: *Dec, repeat * till round ends (6)
-Leave a long tail and cast off
-Assembling the tail to body between the legs
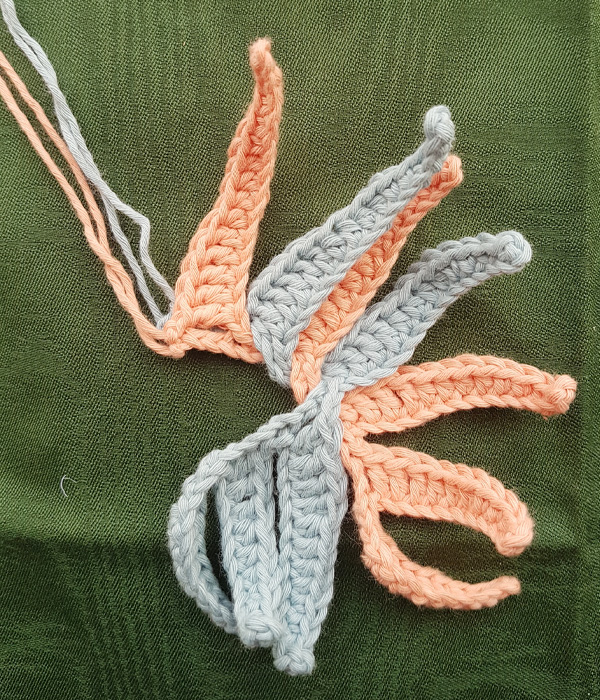
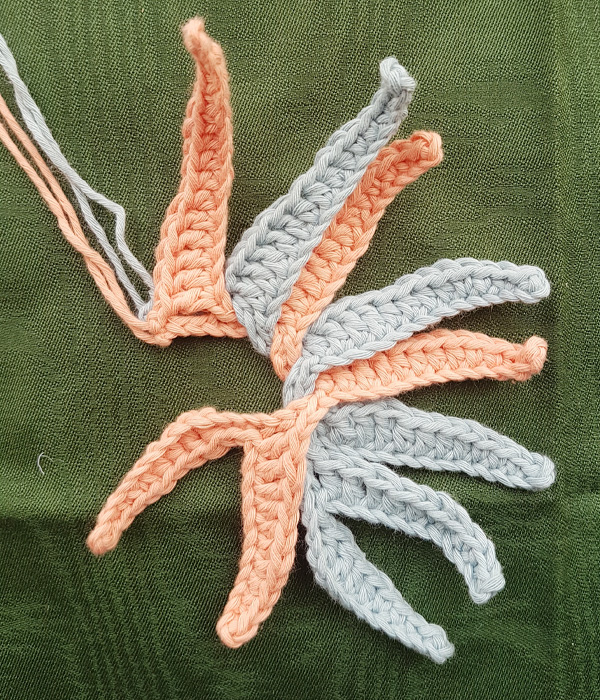
Hair
3 different colors for hair, light pink, light blue and light green.
Light Green Hair
Use light green yarn,
ch 30,
sl st in the 3rd ch from hook, sc in next 3 chs, hdc in next 3 chs, dc in next 3 chs, skip next ch, sl st;
*skip next ch, sl st, ch 12, sl st in the 3rd ch from hook, sc in next 3 chs, hdc in next 3 chs, dc in next 3 chs, skip next ch, sl st in next ch, repeat * till the end of the chain.
-Leave a long tail and cast off
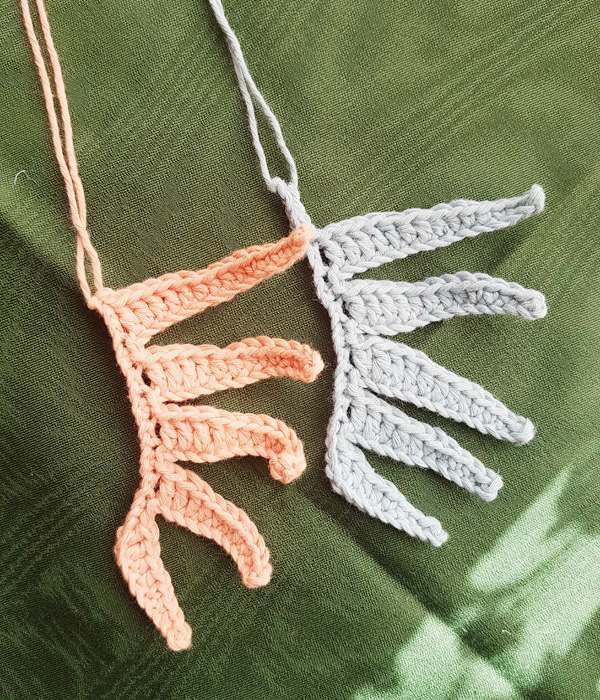
Light Pink & Blue Hair
Same pattern instruction for light pink and blue hair but except light blue hair has to do 4 extra chains,
Use light pink/blue yarn,
ch 28/ ch 32,
sl st in the 3rd ch from hook, sc in next 3 chs, hdc in next 2 chs, dc in next 2 chs, skip next ch, sl st, skip next ch, sl st;
ch 10, sl st in the 3rd ch from hook, sc in next 3 chs, hdc in next 2 chs, dc in next 2 chs, (skip next ch, sl st) x 2
ch 12, sl st in the 3rd ch from hook, sc in next 3 chs, hdc in next 3 chs, dc in next 3 chs, (skip next ch, sl st) x 2
ch 14, sl st in the 3rd ch from hook, sc in next 3 chs, hdc in next 4 chs, dc in next 4 chs, (skip next ch, sl st) x 2
ch 16, sl st in the 3rd ch from hook, sc in next 4 chs, hdc in next 4 chs, dc in next 4 chs, skip next ch, sl st
*For light blue hair, it will have 4 chains leftover at the end.
-Leave a long tail and cast off
-Assembling the hairs
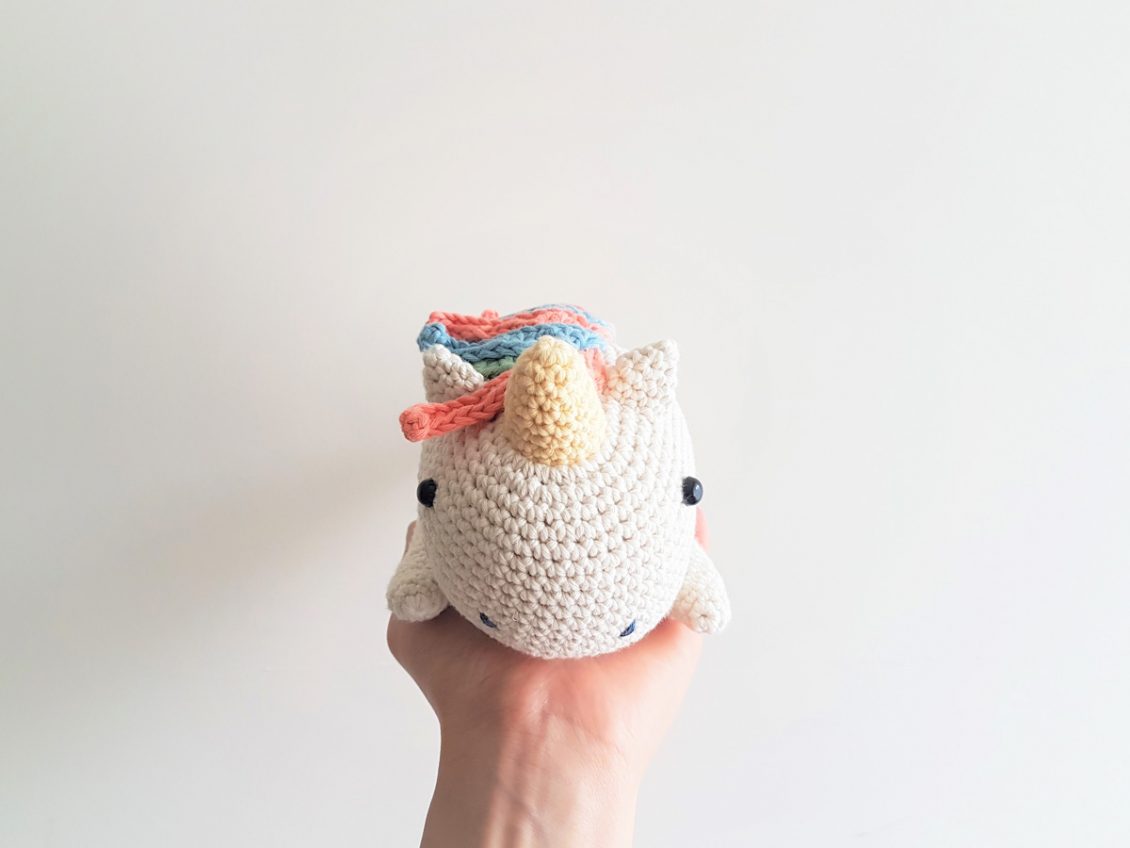
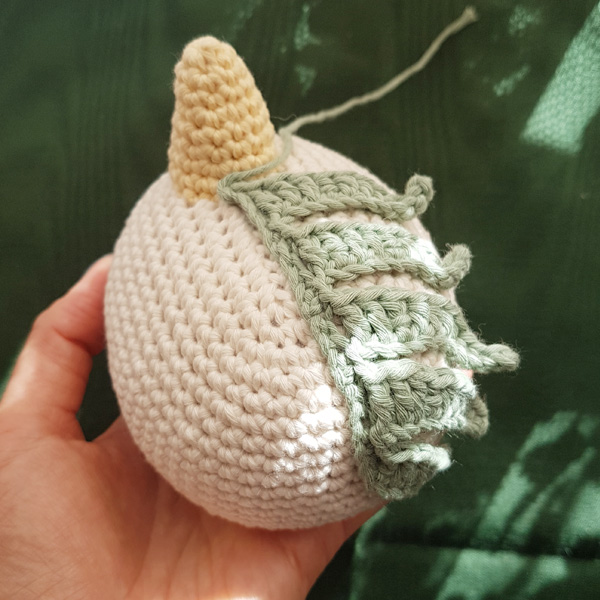
1, Sew light green hair on the head, behind the horn
2, Put the light pink hair on the top of the light blue hair
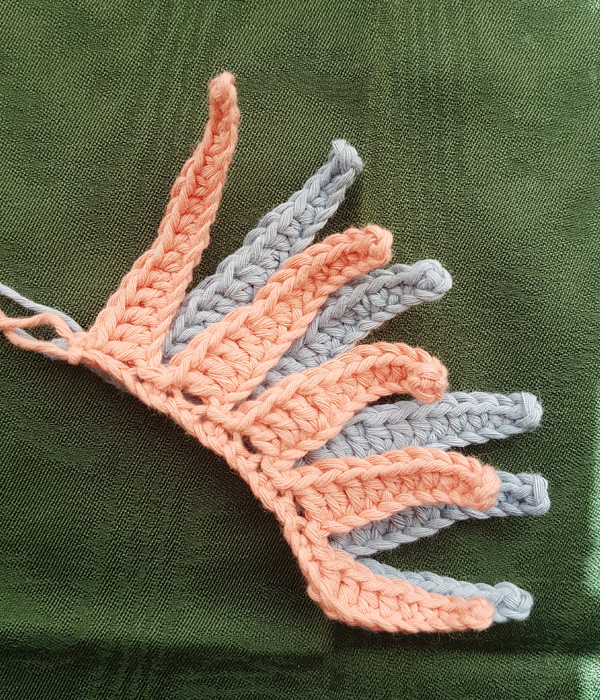
3, Hold the longest pink hair and bring the blue hair from the bottom to the top, like making hair braid,
4, Then, bring the pink hair from the bottom to the top,
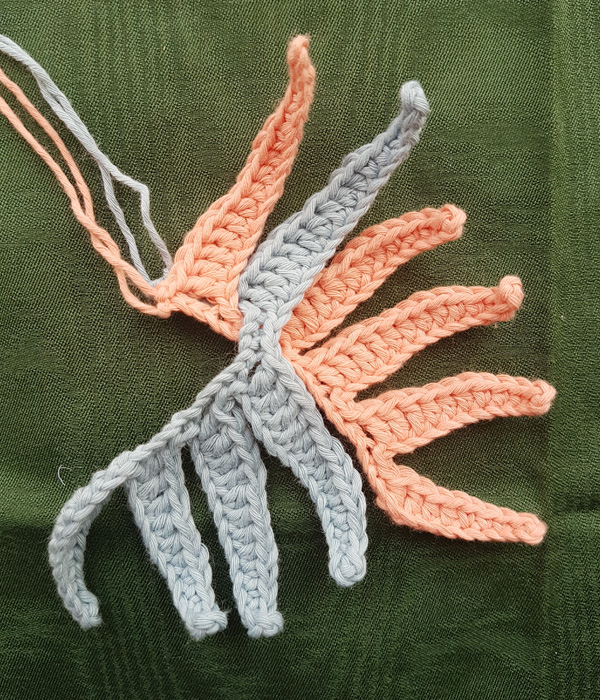

5, Alternatively bring either light pink or light blue hair from the bottom to the top till the end,

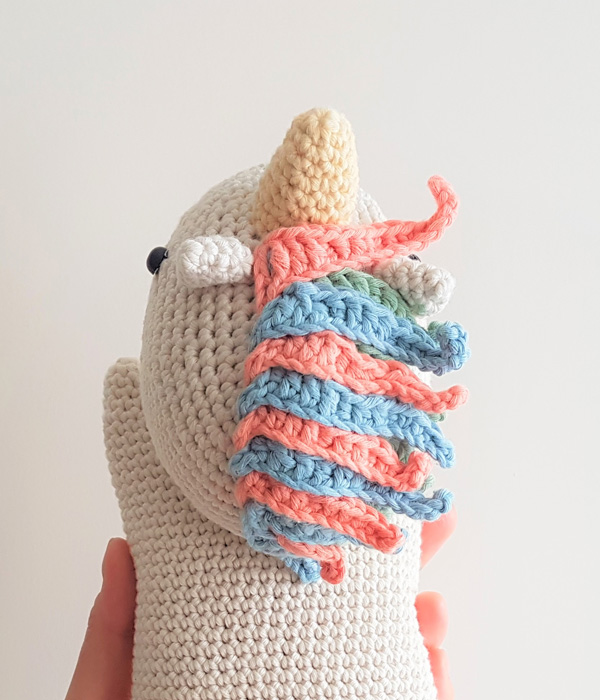
6, Attach the light pink and light blue hair braid on the top of the light green hair.

Ears (2 pieces)
Use creamy color yarn,
Round 1: Magic Ring (4)
Round 2: *sc, 2sc in next st, repeat * till round ends (6)
Round 3: *sc, 2sc in next st, repeat * till round ends (9)
Round 4-5: sc around (9)
-Leave a tail and cast off
-Assembling on the head, 2 sides behind the horn
Finally, sew 2 nostrils at the tip part of the head.
And here is your Unicorn Wrist Rest Cushion.
15 thoughts on “Unicorn Crochet Wrist Rest Cushion (Free Crochet Pattern)”
Leave a Reply
Related posts
Adorable Elephant (Free Crochet Pattern)
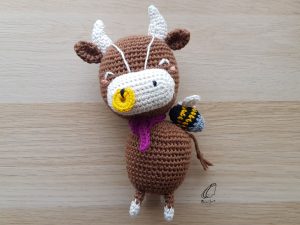
Year of the Ox – Mr. Ox Crochet Pattern

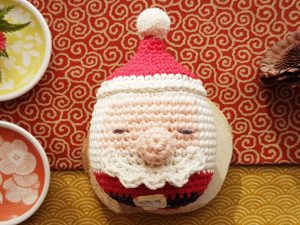
Santa Claus Christmas Ornament (Free Pattern)

Studio Ghibli Ootori-Sama Door Stopper (Free Crochet Pattern)
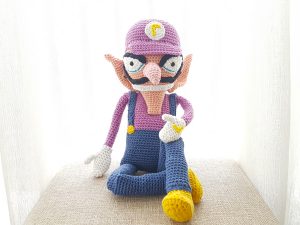
Waluigi Crochet Doll / Wrist Cushion
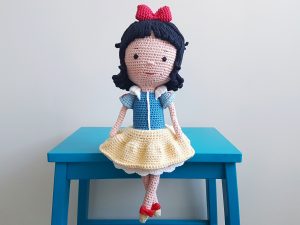
Snow White Crochet Pattern
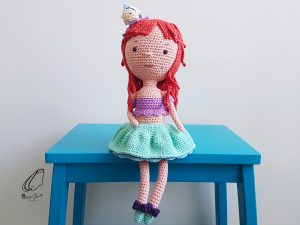
Ariel Crochet Pattern
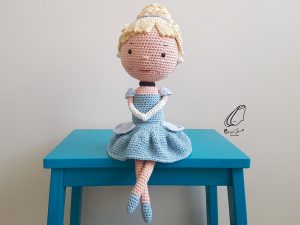
Cinderella Crochet Pattern
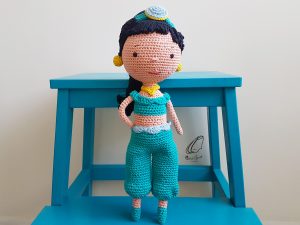
Jasmine Crochet Pattern
X’mas Santa Clause Ornament (Free Crochet Pattern)
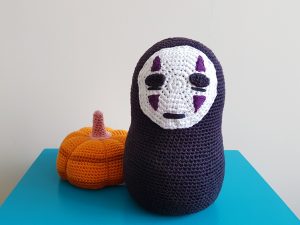
Studio Ghibli No-Face Crochet Door Stopper (Free Crochet Pattern)
Studio Ghibli Boh Door Stopper (Free Crochet Pattern)
Lion Head for Lion Dance (Free Crochet Pattern)
Twitter Bird Crochet Pattern
Crochet of Sobble from Pokemon
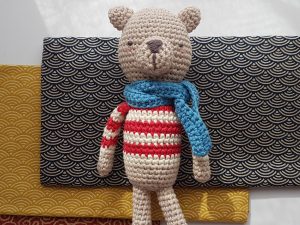
Teddy Jack (Free Crochet Pattern)
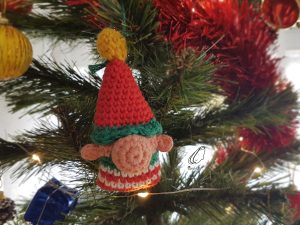
Mini Elf Christmas Ornament ( Free Pattern)
Hot Air Balloon Crochet Pattern
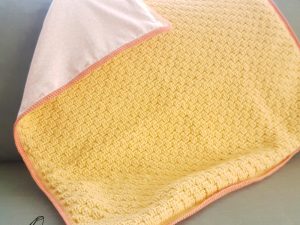
Basket Weave Stitch Baby Blanket
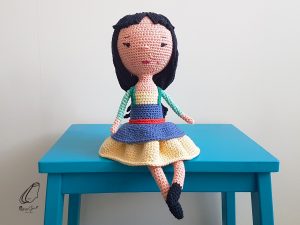
Mulan Crochet Pattern

Popular Posts
 Unicorn Crochet Wrist Rest Cushion (Free Crochet Pattern)
  Crochet Magic Ring for Beginner
  Jasmine Crochet Pattern
  Lion Head for Lion Dance (Free Crochet Pattern)
  Crochet Round: Magic Ring ends with Slip Stitch
 Products
-
 Year of the Ox - Mr. Ox C...
$5.00
Year of the Ox - Mr. Ox C...
$5.00
-
 Twitter Bird Crochet Pattern
$2.00
Twitter Bird Crochet Pattern
$2.00
-
 Mulan Crochet Pattern
$5.00
Mulan Crochet Pattern
$5.00
-
 Jasmine Crochet Pattern
$5.00
Jasmine Crochet Pattern
$5.00
-
 Ariel Crochet Pattern
$5.00
Ariel Crochet Pattern
$5.00
WoW i love it ! Thank you for this Tito 😻
This is way too cute, thank you so much for sharing!
I don’t see the directions for the ears??
Thanks for your reminder, already added the instructions!
Pingback: Here and Now: May – Ayundabhuwana's Blog
Hi! I was a little confused about the very first step. How do I go from 11 chains to 27 stitches in the next step? and how does this make a circle? I have been trying to figure it out for a little while and I just don’t understand.
Hi, Brandi,
I’ve sent you an email to explain a bit more about the pattern, hope that can help 🙂
This is so unique! I brought mine to work and everybody loves it. Definitely feeling inspired to make other animals. All the shapes are quite a good base for making other animals, so hope you don’t mind if I experiment and take inspiration from your pattern ☺️
Hi, Ayunda,
I’m happy to hear that you and your colleagues love this crochet project. 😊 And, yes, you can try to make other animals on the basis of this pattern. Happy Crochet!
Ibby
One Zero Crochet
I love this so much! Would you recommend this for a beginner or does someone need to have been crocheting for some time to grasp this.
Hi, Angelica,
Thanks for your message. I would say this pattern is good for those who already know the basic crochet skills and the basic pattern terminology.
Ibby
One Zero Crochet
i love the pattern and the unicorn is sooo cute thanks for sharing this beautiful pattern. Do you mind sharing the link where to buy the yarns you used?
You’re welcome, Erika ☺
I got the yarn in my local yarn store, but you can seach the brand of the yarn to see if you can get it in your region 😊
Ibby
One Zero Crochet
Ahhh! Thank you for such a beautiful pattern! I am almost done mine. I just wanted to ask, at the part where we start making the hair you mention ‘hsc’ I have never heard of this is it the same as a half double crochet? Sorry if I sound silly right now haha
Hi, Winona,
Not at all, and thanks for the correction. You’re right, it should be “hdc” instead of “hsc”. I’ve already corrected the pattern on the blog.
Hope you enjoy crocheting this unicorn rest cushion.😊
Ibby
One Zero Crochet